Things To Learn, Try First…
Full Site Editing (FSE) Tips & Tricks For Beginners
Here’s some super-actionable Full Site Editing (FSE) tips and tricks that all new users and beginners should know…
TL;DR: Essential WordPress FSE Tips & Tricks 🛠️
Ready to build a polished WordPress site with Full Site Editing? Here’s what’s covered in this guide…
- 🚀 List View for Complex Layouts: For pages with nested or complex structures, List View is a game-changer. Organize, edit, and manage blocks easily, especially helpful for multi-section pages.
- 🖌️ Customize Your Header and Footer: Make your header and footer uniquely yours with blocks like logos, menus, and social icons. Pro-tip: Use List View for easy navigation and menu editing!
- 🖼️ Create Custom Templates: Design unique layouts for different pages, from blog posts to landing pages. With FSE and tools like Ollie Pro’s 200+ templates, custom designs are easy to create and apply site-wide.
- 🔄 Synced & Partially Synced Patterns: Use Synced Patterns to update global elements like testimonials and Partially Synced Patterns for custom tweaks on individual pages—keep the design consistent but editable where you need it!
- 🎨 Utilize Global Styles: Set fonts, colors, and layouts that automatically apply across your entire site. Easily maintain a cohesive, branded look and tweak styles site-wide in seconds.
- 📚 Experiment with Pattern Libraries: Quickly add pre-designed sections (like headers or testimonials) with patterns! Ollie Pro offers an expanded library of high-quality, customizable patterns for faster site building.
- 📜 Save and Reuse Block Patterns: Create reusable patterns for frequently used layouts—think TL;DR boxes, CTAs, and forms. Save time and ensure a consistent design across posts.
Starting with a blank page—or, in this case, your FSE theme—can feel overwhelming, but it’s actually an opportunity to create something truly yours.
Getting started is always the toughest part, but with Full Site Editing (FSE), you have so much more control.
Think of your first design as a foundation you can build on and refine over time, and once you learn the basics of full site editing (FSE) you’ll quickly discover just what is possible when it comes to design and customization.
Whether you’re using WordPress’s Twenty Twenty-Four theme or a third-party FSE theme like Ollie or Neve, the initial setup phase, where you design how everything will look and function, is ALWAYS challenging.
This is where you set the style and layout of your site, and it’s natural to spend extra time figuring out what works best for you.
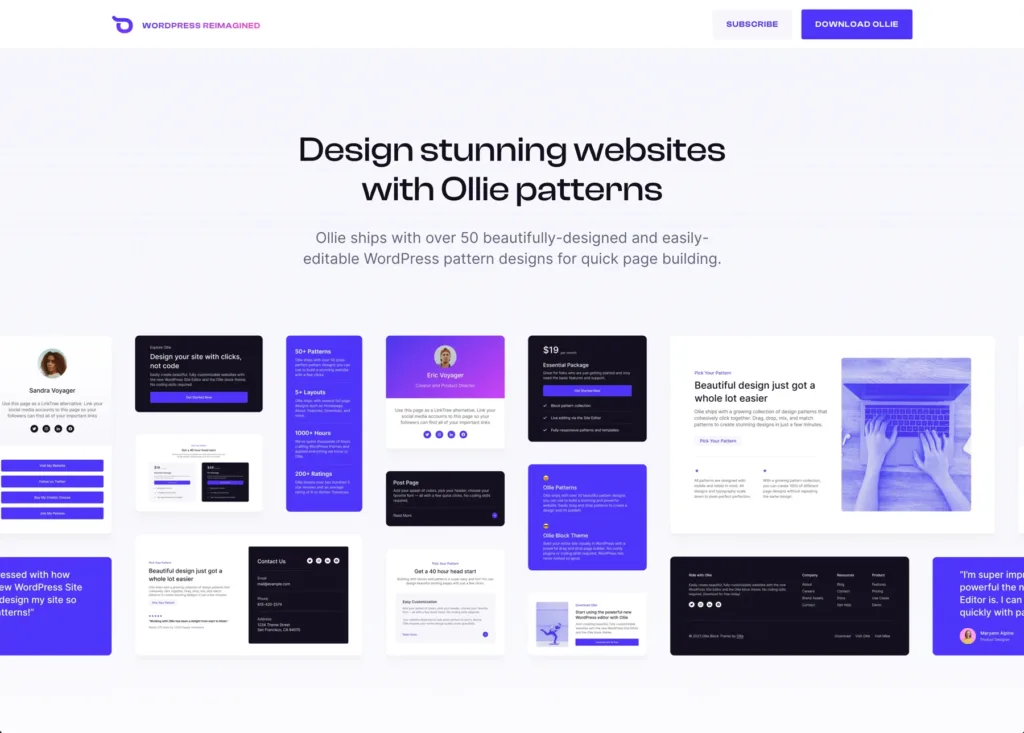
If you don’t want to get bogged down in endless tweaks to blocks, patterns, and styles, consider using Ollie—we built it specifically to make launching a new site faster and easier.
Ollie comes with pre-designed patterns and settings that take a lot of the guesswork out of FSE, so you can get a polished-looking site up and running without hours of fine-tuning.
Even if you do start with Ollie—or any other FSE theme—it’s still worth learning a few FSE basics.
Knowing your way around the Site Editor will make things easier as your site grows and evolves.
The more you understand about FSE’s capabilities, the more you’ll be able to customize your site to meet your needs.
FSE offers a lot of creative potential, and getting comfortable with it now will pay off as you continue to develop and refine your website.
WordPress FSE Tips & Tricks For New Users
Customize Your Header and Footer
Your header and footer are the first and last things visitors see, so making them unique can have a big impact on your site’s look and feel.
With FSE, customizing these areas is simple and gives you full control over their design, so you can make it look exactly how you like.
Pro-tip: ALWAYS use the List View when editing the main menu, it makes life so much easier. You can quickly duplicate links, reposition them, and quickly add in sub-folders too.
Here’s How It’s Done:
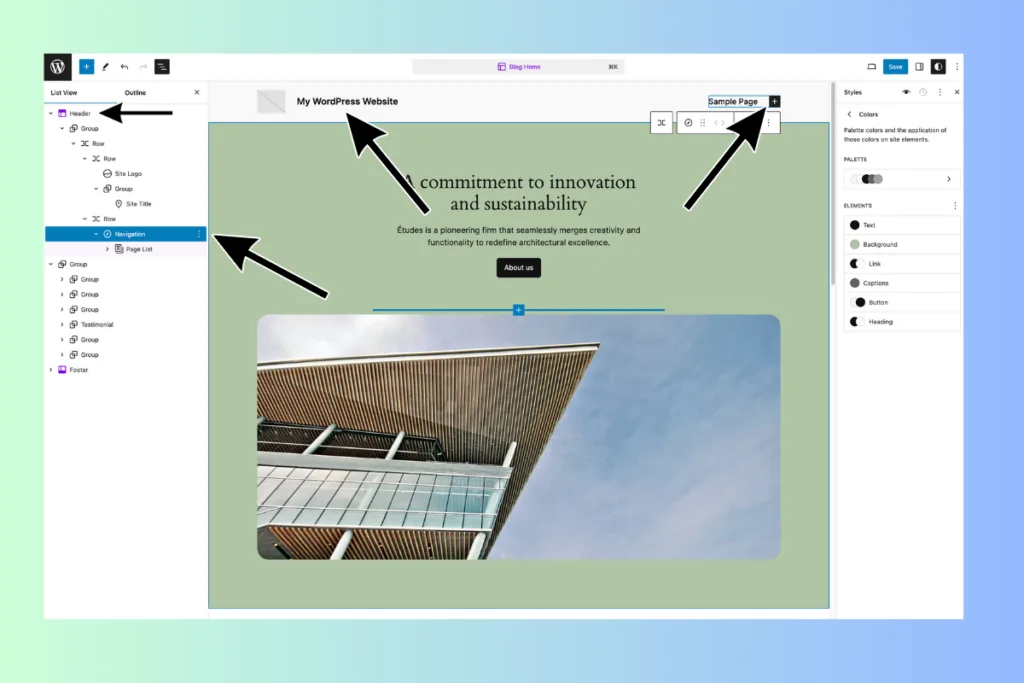
- Open the Site Editor, and click on the header or footer area. This activates the editing options for that specific section.
- Use blocks to add or remove elements like your site logo, navigation menu, social icons, or even a search bar.
- Adjust spacing, alignment, and any other layout settings to match your design vision. You can create a minimal header with just a logo and menu or go for a more detailed footer with links, icons, and contact info.
- When you’re satisfied, remember to save your changes to keep your new header and footer design.
Experiment with different elements to see what best fits your brand and makes navigation easy for your visitors.
Create Custom Templates
Templates control the layout for different types of content on your site, like blog posts, category pages, or product pages.
You can really go to town with custom templates as well; there’s no upper limit. You can have a custom template for news articles, reviews, affiliate posts – whatever you like.
This kind of customization is just NOT possible with the Classic Editor.
With design, you can get as advanced or as simple as you like. From creating engaging landing pages to resource hub pages, with FSE the only limit to what you can do is your imagination (and design skills).
If you’re not a professional designer – and let’s face it, that’s like 99.9% of people reading this – you can use tools like Ollie Pro which comes with over 200+ professionally design templates, patterns, cards, and posts and pages inside Ollie Pro.
So, when it comes to creating a landing page or a new post template, all you need to do is open the Ollie Pro cloud library inside WordPress, select the pattern or design you want, and click insert.
That’s it – you now have a fully designed, custom template. And because all of the Ollie Pro elements and patterns are created using WordPress, you can edit and customize them as much as you want.
Or, if you want to learn to do it yourself and get your first custom template setup just follow the steps outlined below…
Here’s How It’s Done:
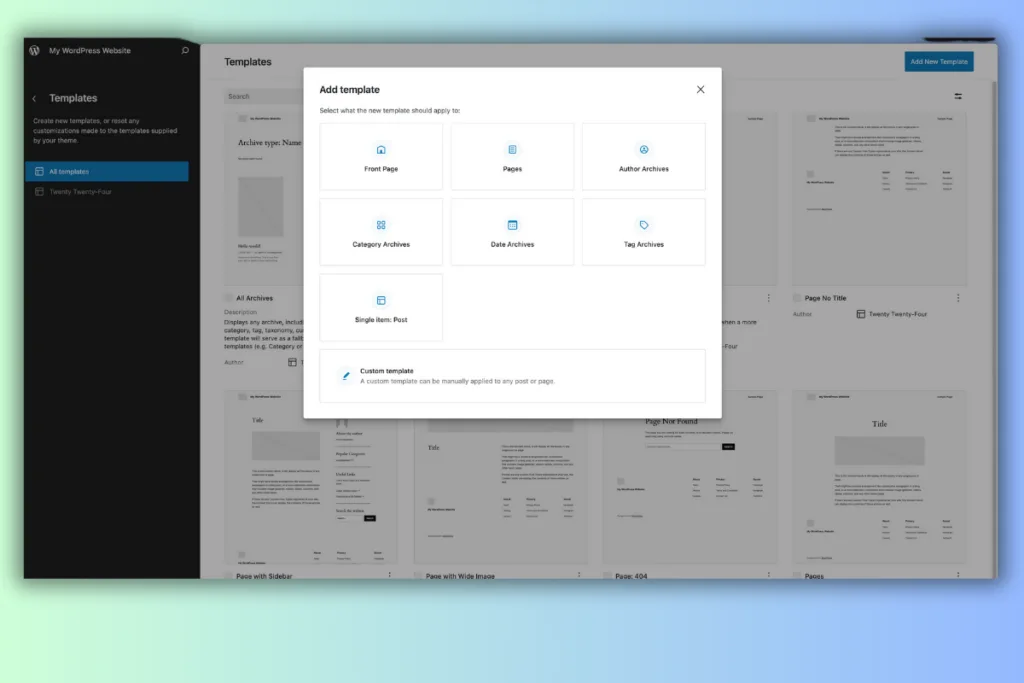
- In the Site Editor, go to Templates and click Add New.
- Choose the type of template you want to create, such as Single Post (for individual blog posts), Archive (for category listings), or Page.
- Use blocks to design the layout of the template. For instance, you might add a featured image block at the top, followed by the post title, content area, and author bio at the bottom.
- Save your new template and assign it to specific pages or post types. Now, any content that uses this template will follow the design you set.
This is a powerful way to give different sections of your site a unique look without having to redesign each page individually.
Synced and Partially Synced Patterns in Full Site Editing
With Full Site Editing (FSE), synced and partially synced patterns offer powerful tools to manage your design elements across your entire WordPress site.
They’re especially useful for anyone who wants to create a cohesive look without having to manually update individual blocks across multiple pages.
What Are Synced Patterns?
A synced pattern allows you to create a block design that can be reused across multiple pages, with every instance staying in sync.
When you make a change to a synced pattern—whether it’s the layout, style, or content—that change is automatically applied to every instance of that pattern on your site.
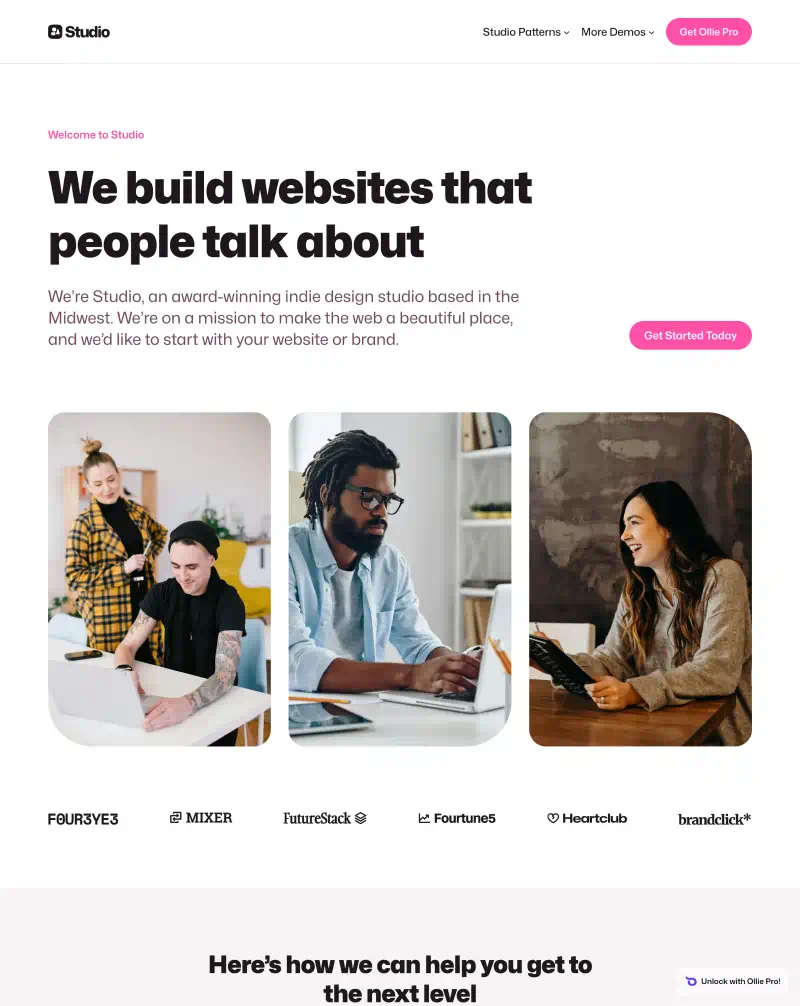
For example, if you have a testimonial block as a synced pattern on both your homepage and your services page, updating the text or design in one place will instantly update it everywhere else that pattern is used.
This is particularly useful for global elements like contact information, company hours, or standard calls-to-action. Synced patterns ensure that any updates are made site-wide, saving you time and reducing the chance of inconsistencies.
What Are Partially Synced Patterns?
Partially synced patterns give you even more flexibility. They allow you to lock certain design elements within a pattern, while leaving other parts editable on individual pages.
Think of them like reusable templates with specific areas that can be customized per instance.
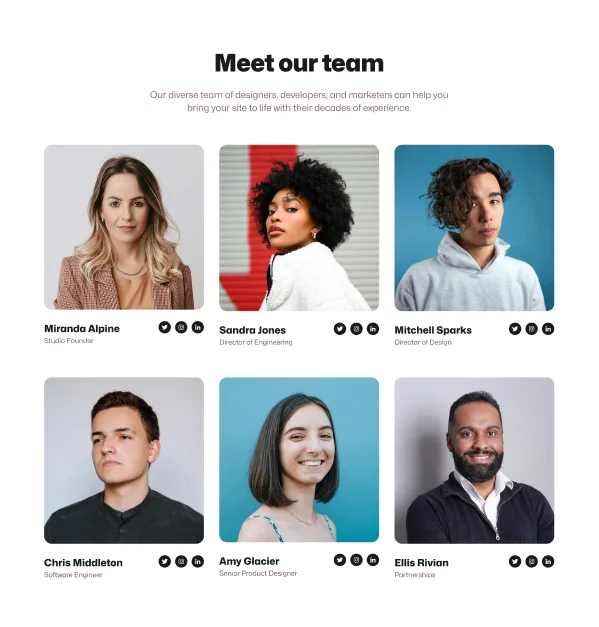
For example, if you have a testimonial box that you want to use across multiple pages but with different quotes, you can create a partially synced pattern.
You could lock the layout, font size, and colors, while keeping the text, name, and image fields editable.
This way, you maintain a consistent design but still have the freedom to customize the content for each instance.
How to Create and Use Synced Patterns
- In the Site Editor, add the blocks you want to use in your pattern, such as text, images, or buttons.
- Arrange and style the blocks to fit your design.
- Select the blocks, then click on the three-dot menu and choose Create Pattern.
- Name your pattern and ensure Sync Pattern is selected. This creates a synced pattern that can be reused across your site.
- To use this pattern, simply go to any page, open the block inserter, and select your synced pattern from the Patterns section. Any design or content changes you make will now be applied globally.
How to Create and Use Partially Synced Patterns
- Start by creating a synced pattern as described above.
- Open the pattern in the editor, and click on the specific block you want to make editable (like a text or image block).
- In the block settings, enable Overrides for the fields you want to be customizable, such as text, image, or title.
- Save the pattern. Now, whenever you add this partially synced pattern to a page, you’ll be able to change the specified content fields without affecting the design or other instances of that pattern.
Why Use Synced and Partially Synced Patterns?
These patterns are invaluable for creating a design system within your site. They help you maintain consistency across pages while reducing the need for repetitive edits.
Imagine having testimonials, CTAs, or FAQ sections that you want to appear on multiple pages, but with slight variations in content.
Partially synced patterns let you lock in the design while letting you update specific content fields, making it easier to scale your website with new content.
For example, if you’re using a partially synced pattern for testimonials, you can keep the same layout and styling but change the name, photo, and quote for each testimonial block.
This saves you the trouble of adjusting each design element for every new testimonial, while ensuring the look stays uniform.
Tips for Using Synced Patterns Wisely
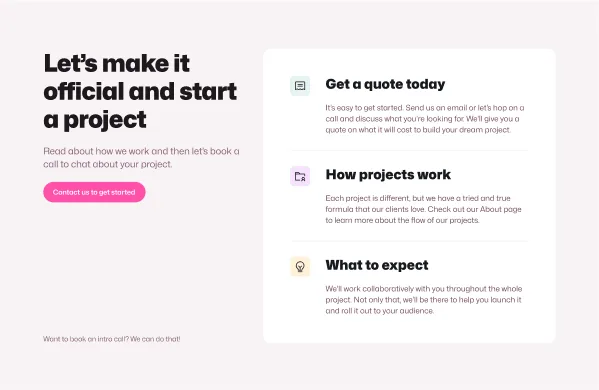
- Think of them as components: By setting up reusable patterns, you create building blocks that can be easily adjusted. This is especially useful if you plan to make updates to your site’s design down the line.
- Future-proof your site: With synced patterns, you might find that instead of redesigning your entire site in the future, you can simply update the design of these patterns and see those changes reflected everywhere they’re used.
- Choose wisely between synced and partially synced: For content that’s consistent across the site (like a footer or contact section), a fully synced pattern works best. For repeated layouts that need unique content, like blog post summaries or product features, go with a partially synced pattern.
Using synced and partially synced patterns effectively will streamline your workflow and create a cohesive, well-organized site.
Whether you’re setting up consistent elements or building more flexible, customizable sections, these patterns allow you to design smarter and more efficiently.
With a theme like Ollie, you have access to a library of patterns to get started quickly and start building a well-structured, professional-looking site with ease.
Utilize Global Styles
Global Styles in Full Site Editing (FSE) allow you to set consistent design elements across your entire website with just a few clicks.
Instead of manually adjusting each page or post to match your preferred style, Global Styles let you control the look and feel of your entire site from a single settings panel.
This not only saves you time but also helps maintain a cohesive, professional design throughout every part of your site, giving your visitors a seamless experience as they navigate your content.
With Global Styles, you can set universal typography choices, color palettes, and layout options that apply site-wide.
For example, you can choose a primary font for headings, a secondary font for body text, and adjust font sizes, weights, and line spacing to fit your brand’s style.
These typography settings will automatically be applied across all your pages and posts, ensuring consistency in how text appears, regardless of where it’s used.
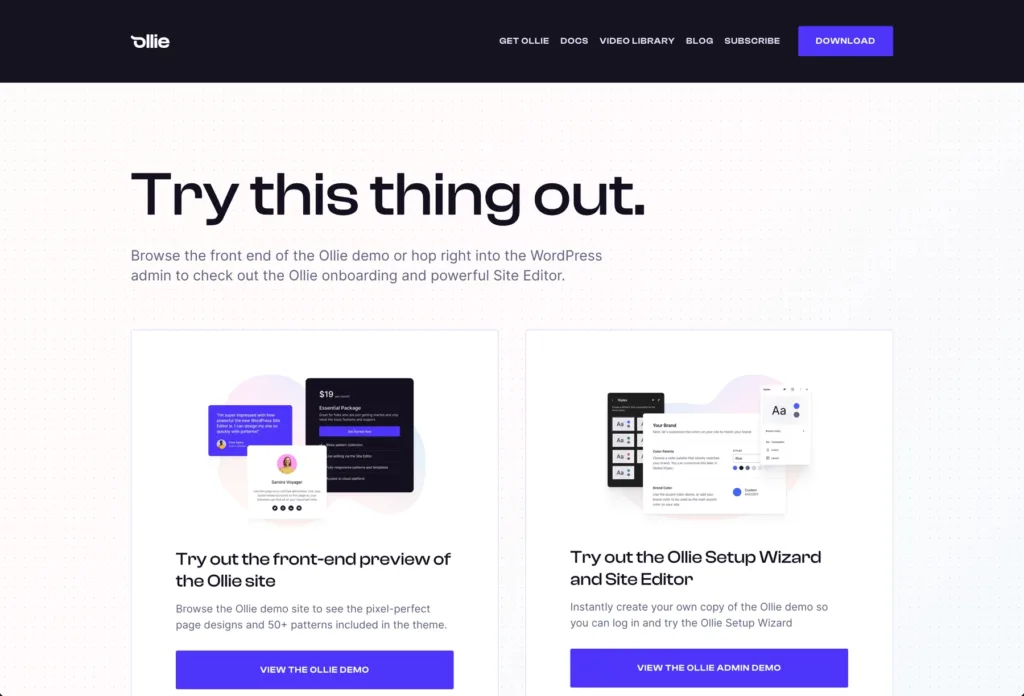
Color is another key aspect of Global Styles. You can select a color scheme that reflects your brand’s identity and set primary, secondary, and accent colors that apply across your entire site.
Imagine choosing a specific color for your buttons, links, and highlights—Global Styles will ensure that color is used consistently everywhere, from blog posts to contact forms, without needing to update each instance individually.
This is especially useful if you decide to change your brand colors later; you can simply adjust the color settings in Global Styles, and the change will propagate across your entire site instantly.
Layout settings in Global Styles allow you to control things like padding, margins, and spacing between elements, creating a balanced look across all your pages.
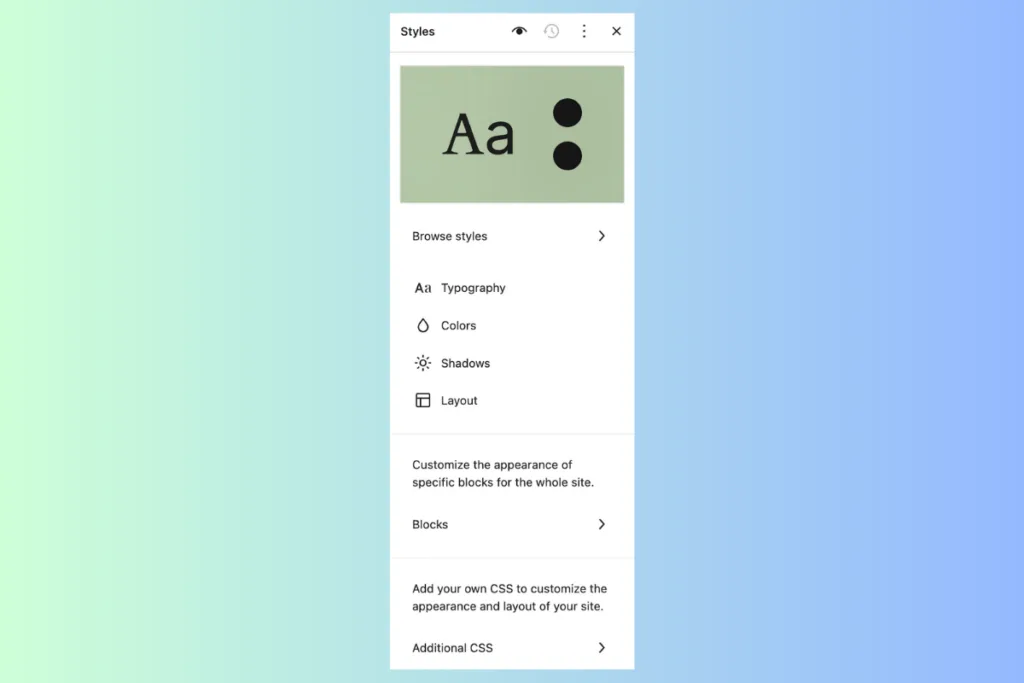
You can also adjust the width of the main content area, ensuring that your text and images align perfectly within the design framework you’ve established.
These layout adjustments help you maintain a structured, visually pleasing design, enhancing readability and usability for your visitors.
The best part about Global Styles is that you’re not locked in—you can override these settings on individual blocks if you need a unique look for a specific section.
For instance, you might want a particular heading on your homepage to have a different color or size. With FSE, you can make these individual tweaks while still benefiting from the overall consistency that Global Styles provide.
It’s a powerful tool for creating a well-branded, visually cohesive website without the hassle of managing style settings on every single page.
Here’s How It’s Done:
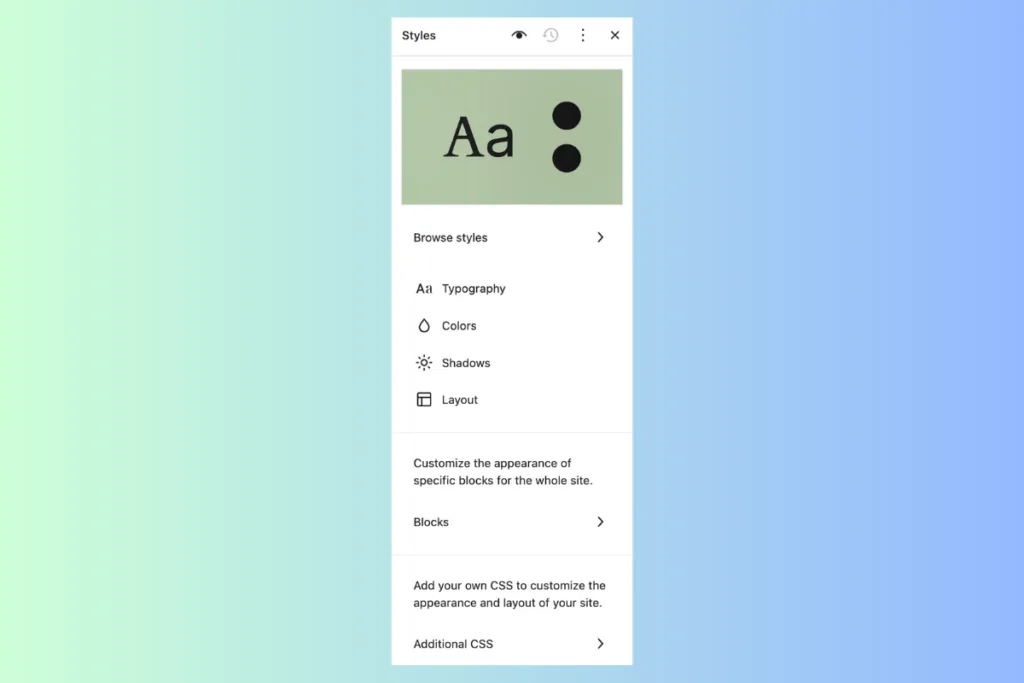
- Click the Styles icon (a paintbrush) in the top-right corner of the Site Editor to open the Styles panel.
- From here, adjust the typography (fonts, sizes), colors, and layout settings that will apply site-wide. For example, you can set a specific font for all headers or choose a color palette that represents your brand.
- These changes will automatically update across your whole site, so everything matches your chosen design.
If there are specific blocks that need a different style, you can always override these global settings for individual blocks. Global Styles are a huge time-saver, especially when you want to make a quick, site-wide update.
Experiment with Pattern Libraries
Patterns are pre-designed block layouts that make building sections of your site quick and efficient, allowing you to achieve a professional look without needing to design each element from scratch.
They are an essential part of Full Site Editing (FSE) and give you access to a range of ready-made layouts for common site elements like headers, footers, testimonials, call-to-action sections, and more.
Patterns save you time and ensure your site maintains a polished, cohesive look.
With FSE, you have access to a library of patterns that you can easily customize to match your brand’s style and content needs.
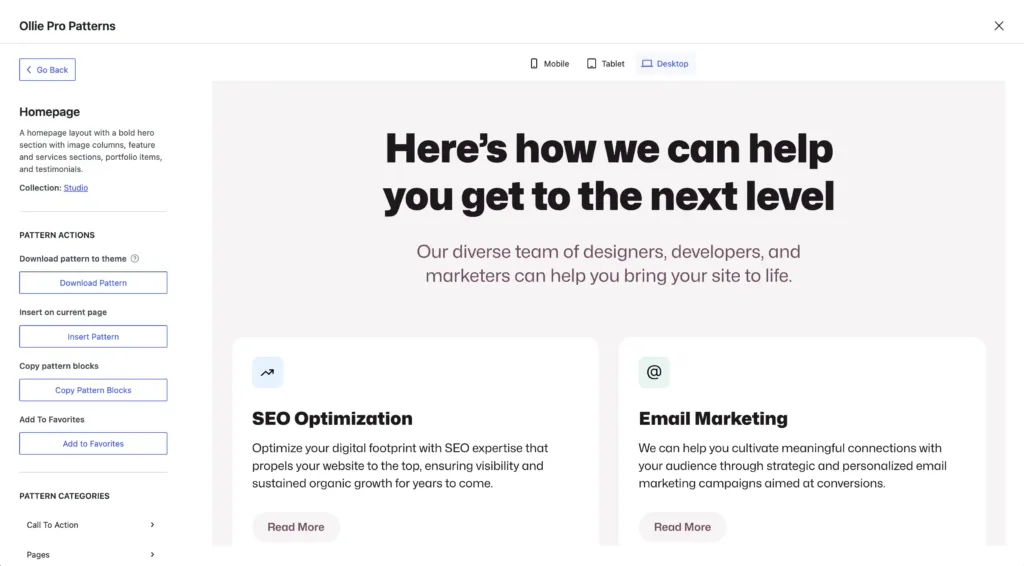
Each pattern is made up of blocks that can be individually adjusted to change text, colors, images, and alignment, so while you start with a pre-built layout, you can personalize it to make it uniquely yours.
For instance, you can use a hero section pattern and customize it with your brand’s colors, font, and images, giving you a striking first impression on your homepage in minutes.
Ollie Pro, a premium extension of the Ollie theme, takes patterns to the next level by offering an extensive library of high-quality, designer-crafted patterns that cover a wide range of website needs.
Whether you’re building a business site, portfolio, blog, or e-commerce platform, Ollie Pro provides patterns tailored to specific sections and functions.
You’ll find options for unique page elements like pricing tables, feature sections, team profiles, and FAQs, all designed to look professional and integrate seamlessly with the rest of your site.
For example, the Ollie Pro testimonial patterns include space for quotes, images, and client names, all styled for visual impact.
Meanwhile, service or product page patterns in Ollie Pro provide structured layouts that guide users through the content, making it easier to present information in a compelling and organized way.
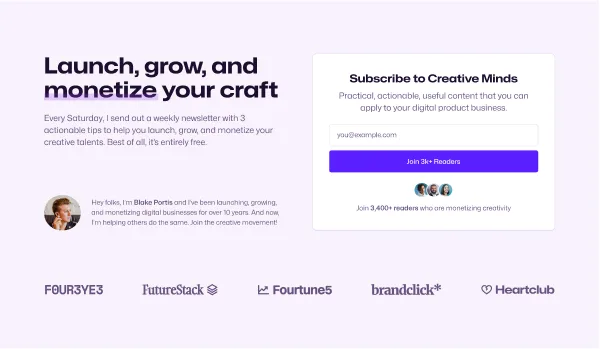
This means you can quickly assemble pages using pre-designed sections that already align with the style and structure best suited to your content.
With FSE and Ollie Pro patterns, building a visually consistent, professional website becomes far more accessible.
You have the flexibility to choose patterns that suit each section of your site and adapt them to match your brand’s aesthetics.
This combination of pre-built, high-quality layouts and easy customization not only speeds up your workflow but also ensures your site looks polished and intentional from top to bottom.
Whether you’re new to WordPress or an experienced site builder, Ollie Pro’s patterns provide the tools you need to create a beautiful, cohesive website with minimal effort.
With FSE, you have access to a variety of patterns that you can customize to fit your style.
Here’s How It’s Done:
- Click the + icon to add a new block, then switch to the Patterns tab.
- Browse the available patterns by category (e.g., headers, footers, testimonials) or search for specific layouts.
- Insert a pattern into your page and customize it by changing text, images, colors, or other elements.
Patterns are perfect for quickly creating visually appealing sections like hero headers, pricing tables, or testimonials. They allow you to add complex layouts without having to build them from scratch, making it easy to design polished pages in less time.
Use the List View When Setting Up Navigation Menu
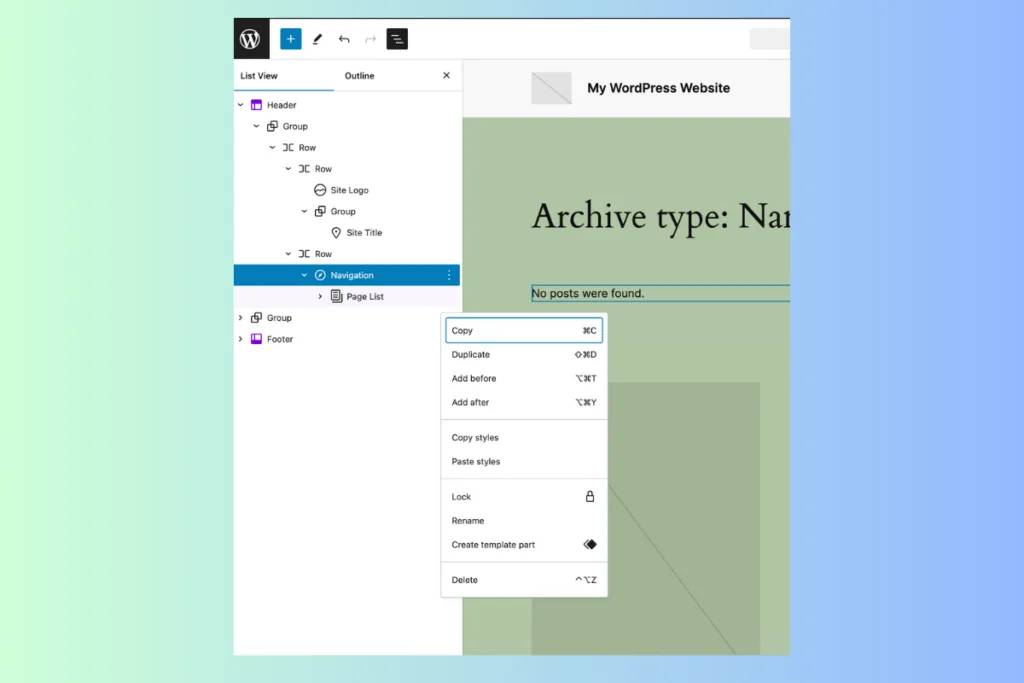
When working with more complex page layouts, the List View is your best friend.
It provides a clear, hierarchical outline of all blocks on your page, making it easy to select, move, or delete elements.
Here’s How It’s Done:
- Click the List View icon in the top toolbar to open a sidebar displaying all blocks in a structured list format.
- Use the List View to quickly find and select blocks, especially nested ones that might be hard to access in the visual editor.
- Move or delete blocks directly from the List View, which saves time and prevents the hassle of scrolling through the editor.
The List View is especially helpful for managing pages with multiple sections or nested blocks, like those created with patterns or custom templates. It keeps everything organized and makes editing large or detailed layouts much easier.
Save and Reuse Block Patterns
If you frequently use the same layout or group of blocks, you can save them as a custom pattern to reuse anywhere on your site.
For instance, on our longer blog posts I like to add a TL;DR box at the top that gives the reader a quick overview of what’s covered in the post.
I’ll usually add in jump-links too, so the person reading it can quickly jump to a section of the post that piques their attention.
I use a card-based pattern for this from Ollie Pro. But to save time, so I don’t have to make every time I do a new post, I created it once, styled it accordingly, and then saved it as a reusable pattern.
Now, when I do a new post, all I have to do is add it in and change the text inside it – all the styling and design is ready to go.
This not only saves time but also ensures that your design remains consistent.
Here’s How It’s Done:
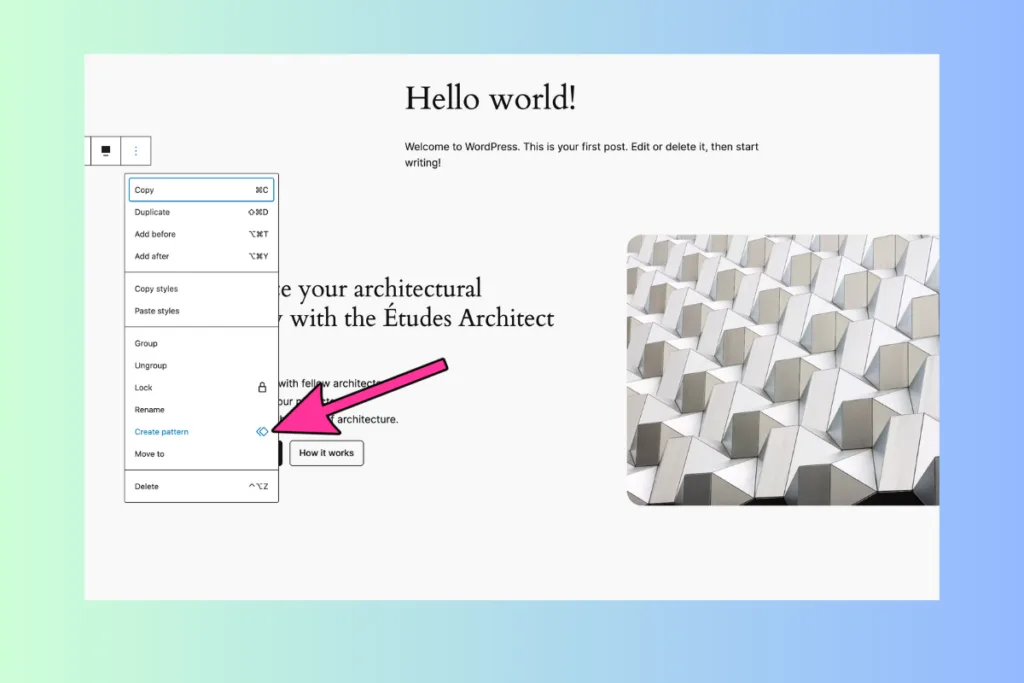
- Select the blocks you want to save as a pattern (e.g., a specific call-to-action section with text, button, and image).
- Click the three-dot menu in the block toolbar, then choose Add to Reusable blocks.
- Give your new pattern a name, so it’s easy to find later.
- Whenever you need this layout again, simply go to the Reusable blocks section and insert it into your page.
Once you get used to creating and saving patterns, you’ll start using them all the time – they’re so useful.
I use them for CTAs, TL;DR boxes, newsletter opt-in forms, and testimonials.
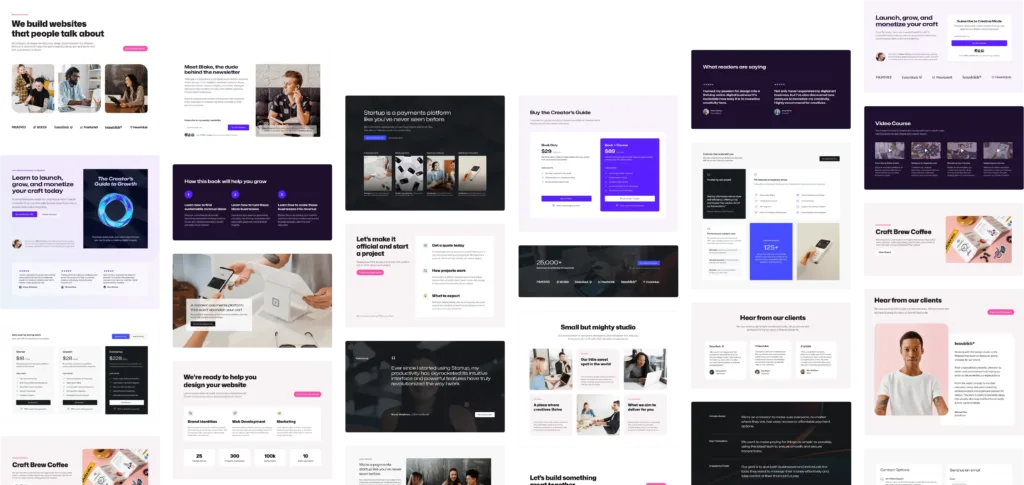
In some cases, I’ll have them synced (this works with testimonials, podcast episodes, etc) and other times I won’t sync them because I want to edit the information inside them when I use it.
If you only take away one thing from this article, make it this – it will save you hours and hours of time over a normal working month.
It’s also one of the easiest ways to make a dull blog post look more engaging too, so make sure you start taking advantage of them today.
Bringing It All Together
By exploring these features, you’ll gain a solid foundation in Full Site Editing and discover how easy it is to customize every aspect of your WordPress site.
Whether you’re tweaking the header and footer, creating unique templates for different content types, or building cohesive styles across your pages, FSE gives you the tools to bring your design ideas to life.
Remember to experiment, try out new layouts and styles, and don’t worry about making mistakes—you can always undo changes or start fresh if needed.
With a bit of practice, you’ll be able to use FSE to create a site that looks exactly how you want, all without needing advanced coding or design skills.