Are you trying to figure out how to edit the footer in WordPress? This guide is for you.
Editing the footer can be confusing for some WordPress users, especially when using a classic theme. Different classic themes handle footers differently, plus you may need to edit code just to make simple changes.
This setup makes editing a footer in WordPress more complex than it has to be. In this guide, we’ll show you how to do this the easy way using Ollie.
Here’s what we’ll cover:
- What a WordPress footer is, and what you can put in it.
- The difference between how WordPress footers work in classic and block themes.
- A step-by-step guide on how to edit the footer in WordPress using Ollie.
Let’s begin by first understanding what a footer in WordPress is and what you can put in it.
What is a WordPress footer, and what can you put in it?
The footer is the section at the bottom of a web page in your WordPress site. It sits below the page’s main content and, like the header, it typically appears on every page of the site.
It can contain things like:
- A copyright notice. This includes the copyright symbol, the current year, and the website name.
- Navigation links. These may be primary menus linking to your site’s main pages. Or secondary menus containing pages not available in the main menu, such as ‘Terms of Service’ or ‘Privacy Policy’.
- Social media links or social icons. Links to your business profile on social media platforms.
- Contact information. Like your business address, phone number, or email.
- Disclaimers. For example, affiliate disclosures, such as “This site may contain affiliate links. We may earn a commission at no extra cost to you”.
There are many more things you can add to your site’s footer. What you include here entirely depends on you. You can even add links to product pages or a newsletter sign-up form.
Why is a WordPress footer important?
Your footer is important for user experience. Many visitors scroll to the bottom looking for important links that they don’t immediately find in your main menu. For example, if they want to find your social accounts or additional support resources, the footer is where they’ll turn.
In this way, your footer becomes a secondary navigation system that makes your site usable.
Depending on what you put here, your footer can help with:
- Conversions. When you add newsletter sign-ups, contact information, and links to your social accounts.
- Branding. Through branding colors, tag lines, and logos.
The footer is a much more important part of your WordPress website than you would probably give it credit for. Which is why you need to design it well.
How WordPress footers work: classic themes vs block themes
Your theme usually controls your site’s footer, and how you edit your footer depends on the type of theme you’re using.
How WordPress footers work in classic WordPress themes
In classic themes, the footer serves as a predefined container designed by the theme developer. The developer determines the footer layout, what you can add to it, and how you can customize it.
Most classic themes use widgets to populate the footer area. If you want to add a navigation menu, text, or image, you select these elements as widgets and add them to the footer widget area.
While widgets handle the content, the Customizer usually handles the look. If you want to edit colors, fonts, padding, etc., you can do it in the Customizer under the Footer tab.
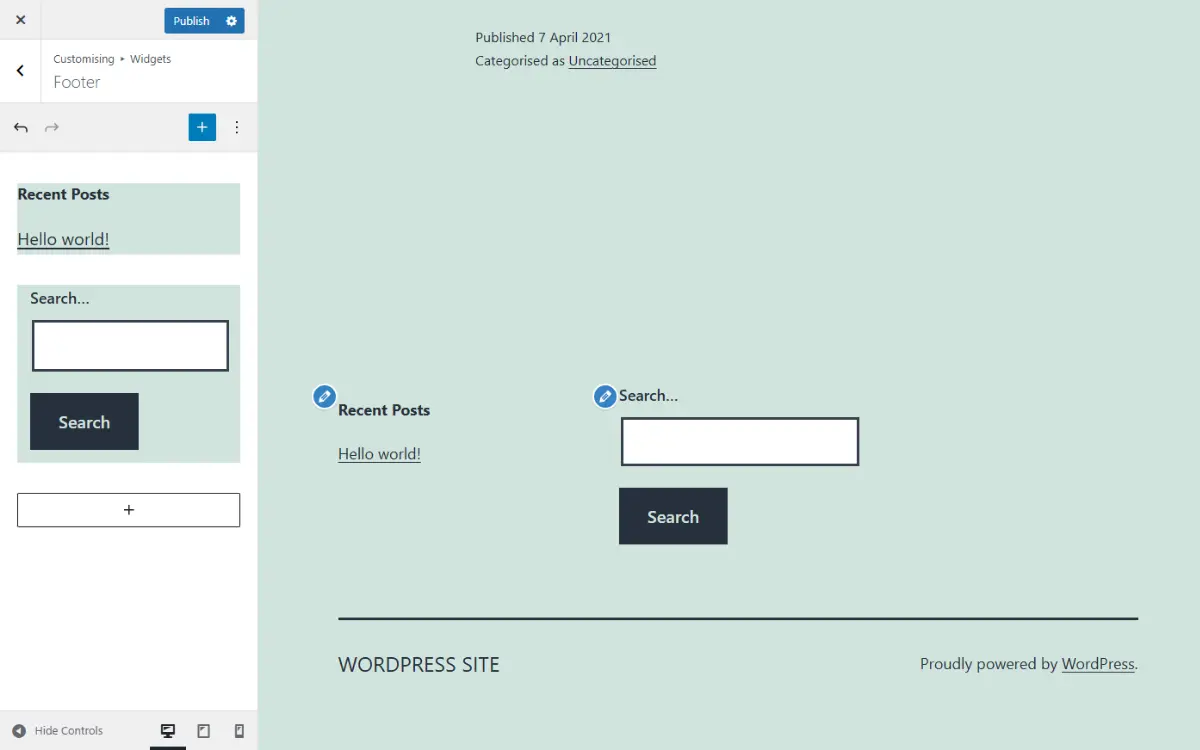
Note: In classic themes, you’re limited to the footer settings the theme’s developer gives you. If they don’t provide a specific setting, you can’t make that setting without going to the theme’s files (a PHP file called footer.php) to edit code.
What if you have a page builder?
If you use a page builder like Elementor, you use a feature in your theme called the theme builder to override the theme’s default footer. You design your footer visually in the theme builder using drag and drop.
While page builders are a bit more flexible than classic themes on their own, they’re heavy. They need to load their own CSS and JavaScript libraries to render the design. This can add unnecessary weight to your site when it loads, affecting its performance.
How WordPress footers work in block themes
Block themes like Ollie treat the footer as a template part. This means that the footer is fully customizable using blocks. You can add anything you want to the footer and customize it without touching code.
If a block exists, you can put it in the footer. Want a search bar next to your latest posts? Want to add a link where users can download your e-book? Simply add these blocks. You can then change the layout, colors, typography, etc., to your liking. In other words, you have the same creative freedom in the footer that you have when editing a web page.
So, in classic themes, the theme developer defines the customizations you can make without editing code. So editing the footer usually means editing code or being locked into what the developer allows. In block themes, the footer section is a template part and is completely editable in the WordPress Site Editor. You can edit everything in the footer without writing code.
Here’s a quick recap of the difference between how footers work in classic themes versus block themes.
The difference between how footers work in classic vs block themes
| Feature | Classic Themes | Block Themes |
|---|---|---|
| Editing interface | Split between the Widgets section and the Theme Customizer. | Everything happens inside the block editor. |
| Architecture | Built primarily with PHP template files. | Built with blocks and template parts. |
| Main file system | The footer is controlled inside a PHP file (footer.php). | The footer is controlled inside an HTML file (footer.html). |
| Ease of footer customization | Building a custom footer is more complex, as it requires you to have some PHP/CSS knowledge to edit beyond what the developer allows. | Easier as it doesn’t need you to edit code. Everything is a block and can be edited in the block editor. |
| Layout flexibility | Rigid. It’s limited to the footer widget areas or columns specified by the theme’s developer. | Much more flexible. You can add or delete columns and elements as you wish. |
| Page builder reliance | Often needed for more visual control over the footer. | Not necessary because block themes include visual editing. |
| Typical frustrations | Customizing the footer isn’t easy. The footer feels hard-coded, and you’ll need to edit code to customize most sections. Tthe editing interface is split, which could cause confusion about where to add content and where to edit it. | It’s a newer workflow which may be unfamiliar to long-term users. |
To edit your footer easily, you’ll need a block theme. It also helps that site editing with block themes is the direction WordPress is heading. Seeing as there are numerous block themes available, what makes Ollie the right block theme to help you edit your website’s footer the easy way?
Why use Ollie to edit your WordPress footer?
Ollie is a lightweight yet powerful WordPress block theme designed for building WordPress websites in the Site Editor. While some themes add block support later, Ollie is built entirely using WordPress blocks. In other words, it’s built around Full Site Editing by default.
You can use it to edit every part of your WordPress site, including the footer. With Ollie, editing the footer feels like editing any other page or section in your site.

How Ollie makes editing footers easy
We recommend Ollie for editing your footer for the following reasons:
- Several well-designed footer block patterns. Ollie Pro has an extensive pattern library with several footer patterns. You can pick one and customize it using the block editor. This is great if you’re a beginner and you don’t want to design your footer from scratch.
- Easily switch between footer designs. Suppose you see a new footer pattern in the Ollie pattern library that you would like to switch to. Ollie lets you do this by simply clicking the footer and selecting the pattern you want to replace your current footer with.
- Everything in the footer is editable. You can add, remove, and resize blocks. If you would like to remove the “Powered by WordPress” footer text, you can choose to replace it or delete the block entirely.
- More customization options for native blocks. For instance, animations and hover effects which make your footer feel more interactive.
- A setup wizard to get you started quickly. Once you install Ollie on your WordPress site, its setup wizard walks you through the key steps to set up your site. This includes selecting the pages you want, typography, and more.
Aside from these, Ollie has many other features that make it suitable for building your site. These include ready-made starter sites, a Menu Designer for creating content-rich menus, a built-in design system, and so much more.
Now that we know what you can use to build the footer, let’s get into the process.
How to edit the footer in WordPress using Ollie (step-by-step)
First, a quick note on the setup. Ollie itself is a free block theme, and Ollie Pro is a separate plugin that runs on top of it to add the pattern library and other premium features. To follow this guide, you’ll need both the free theme installed and Ollie Pro activated on top.
You can install the free Ollie theme by going to Appearance → Themes → Add Theme on your WordPress dashboard, then searching for ‘Ollie.’ Once that’s done, here’s how to add Ollie Pro.
Step 1: Install Ollie Pro
To get Ollie Pro, follow these steps:
- Go to the Ollie website and purchase Ollie Pro. After your purchase, Ollie automatically creates an account for you and emails your login details.
- Sign in to your account and head to My Account.
- Under the My Downloads section, click the link to download the Ollie Pro plugin.
- In your WordPress dashboard, go to Plugins → Add New → Upload Plugin. Upload the file, then click Activate.
Once Ollie Pro is activated, you’ll have access to the Ollie Pro pattern library inside the Site Editor.
Note: If you use Ollie’s in-built Site Setup Wizard, you’ll be walked through some basic footer layout options that you can customize more later.

Step 2: Navigate to the footer template
In Ollie (and block themes in general), the footer is a template part that can be edited visually in the Site Editor. So to access the footer, you’ll need to open the Site Editor.
Follow these steps to do this:
- From your WordPress dashboard, go to Appearance → Editor. This opens the Site Editor.
- Next, click on All template parts to reveal all template parts currently in use.
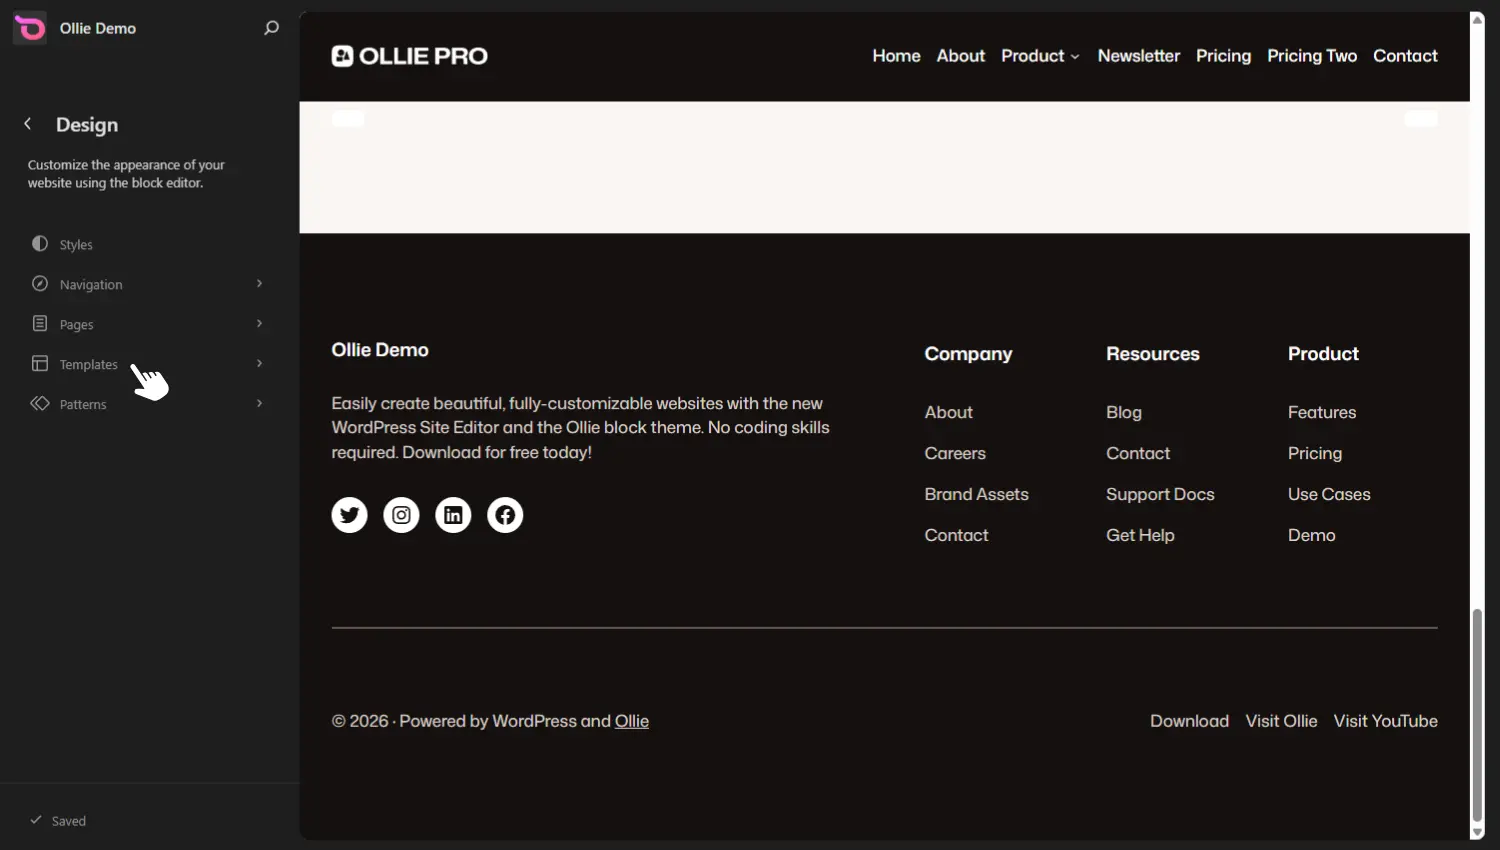
- Then click on the Footer template part to edit it.
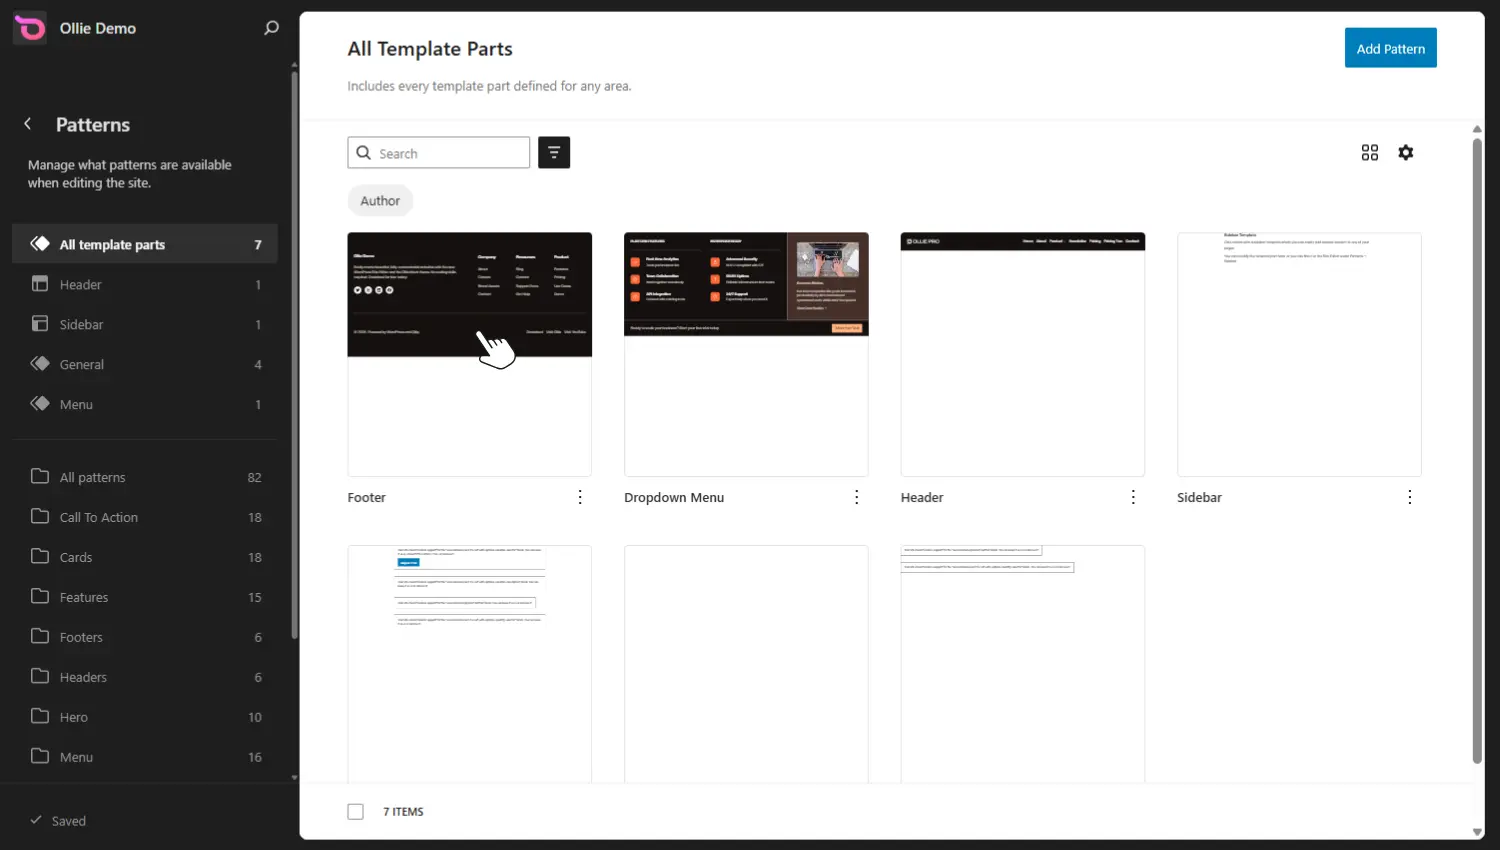
Note: In the sidebar, below the All Template Parts section, you’ll see several patterns in the Ollie pattern library. Here are patterns for different parts of a website, including headers, reviews, pricing sections, hero sections, and (of course) footers.
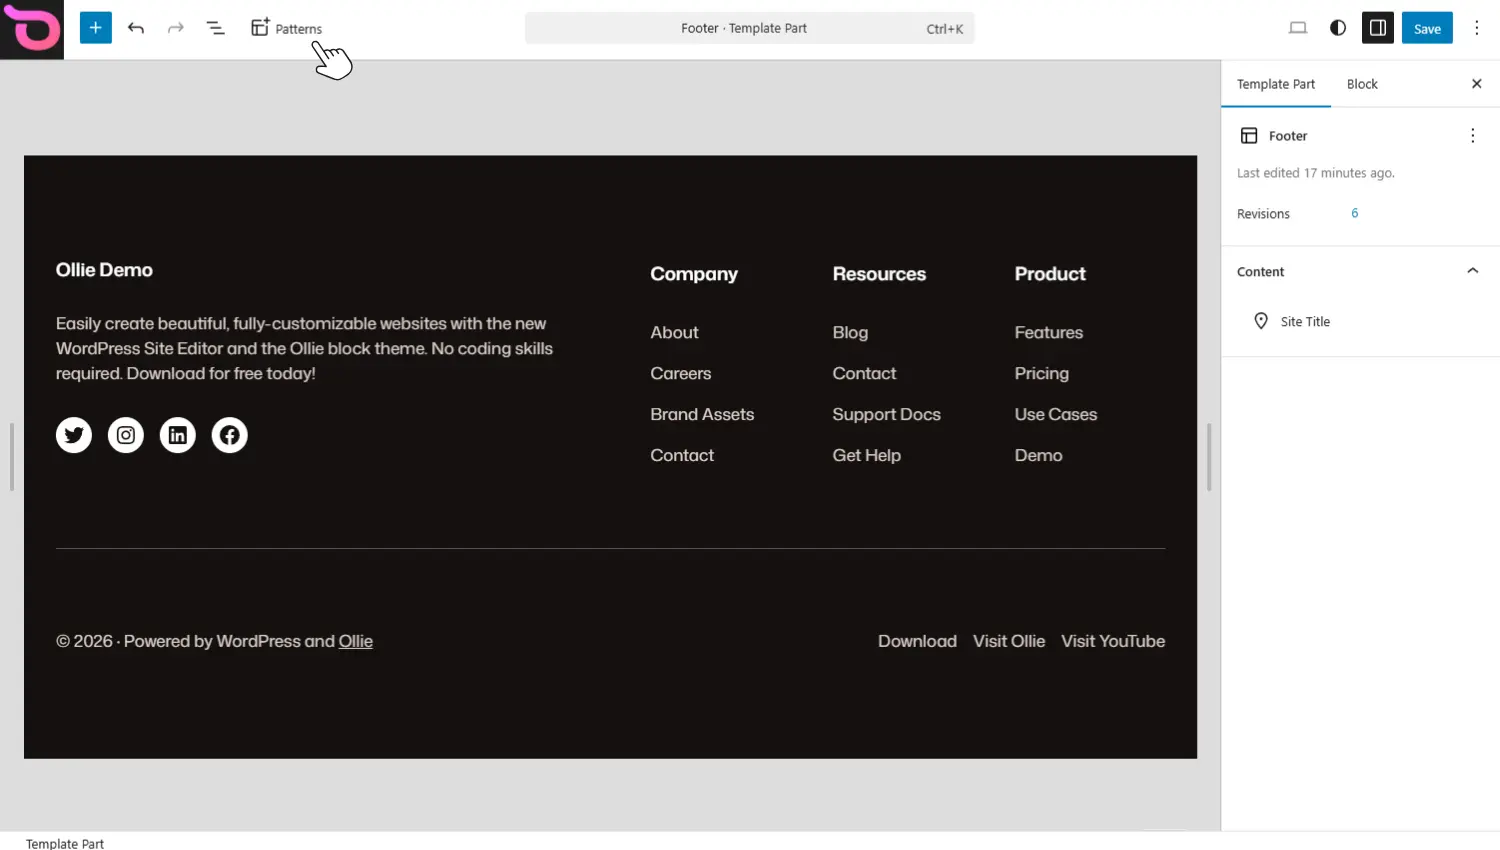
Step 3: Edit the footer’s content
You’ll now be able to edit your current footer template. While here, you can either edit the existing content within your footer or replace the footer’s design.
To replace the design completely, take the following steps:
- Click the Patterns icon at the top of the screen. This will open the Ollie Pro Patterns library.
- In the sidebar on the left, scroll and click on the Footer link under Pattern Category. This will show you all the pre-made footer designs that come with Ollie.
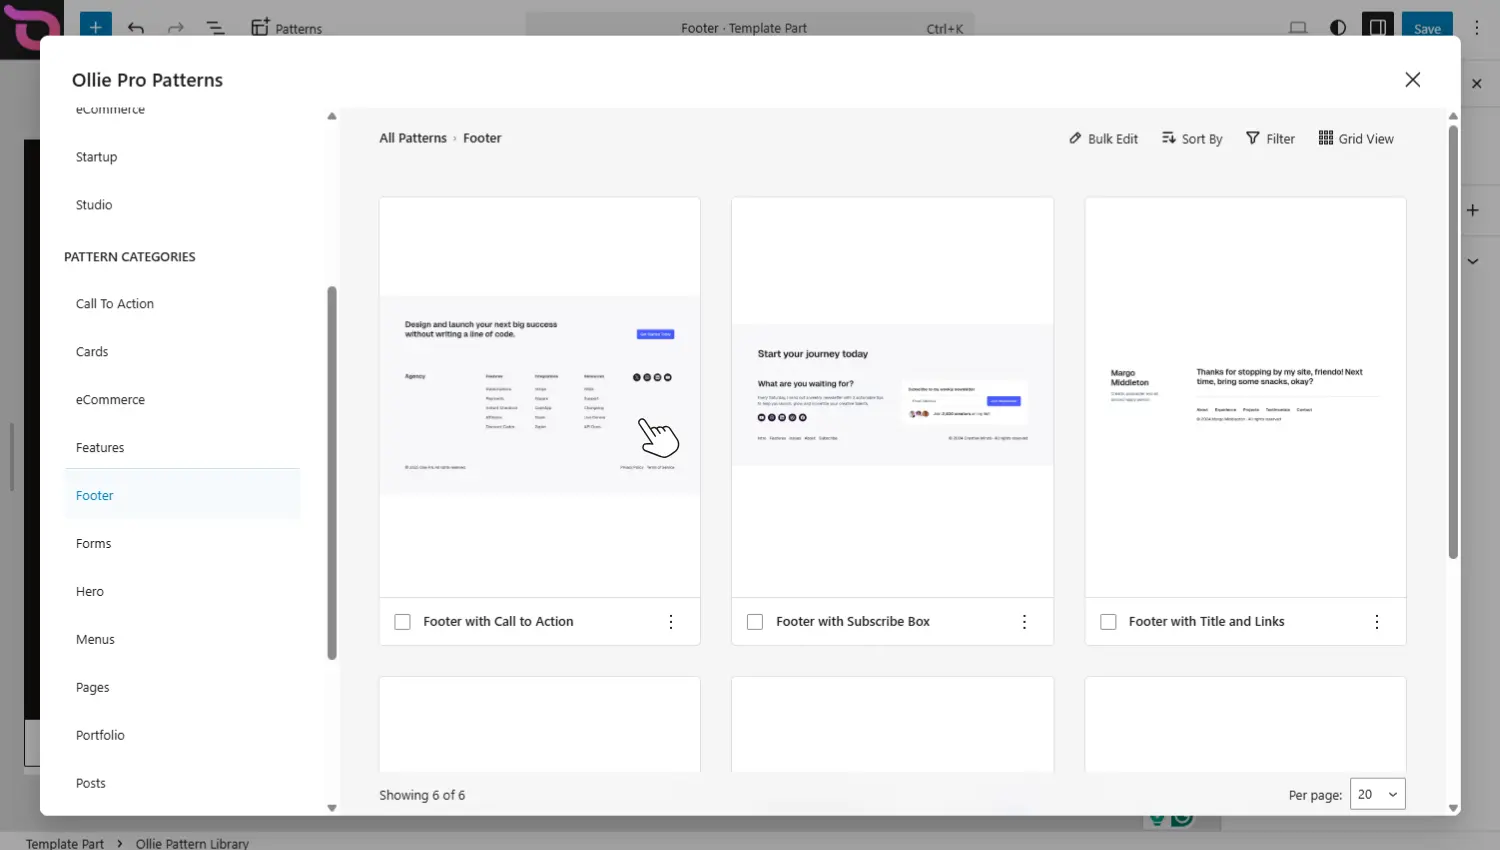
- Click on one you like and then click the Insert Pattern button to add it to your footer design.
- This adds the pattern below your existing footer rather than overwriting it. So make sure to delete what you don’t need. IF you want to delete content. All you have to do is select the block, click on Options (three dots), and click Delete at the bottom. It’s that simple.
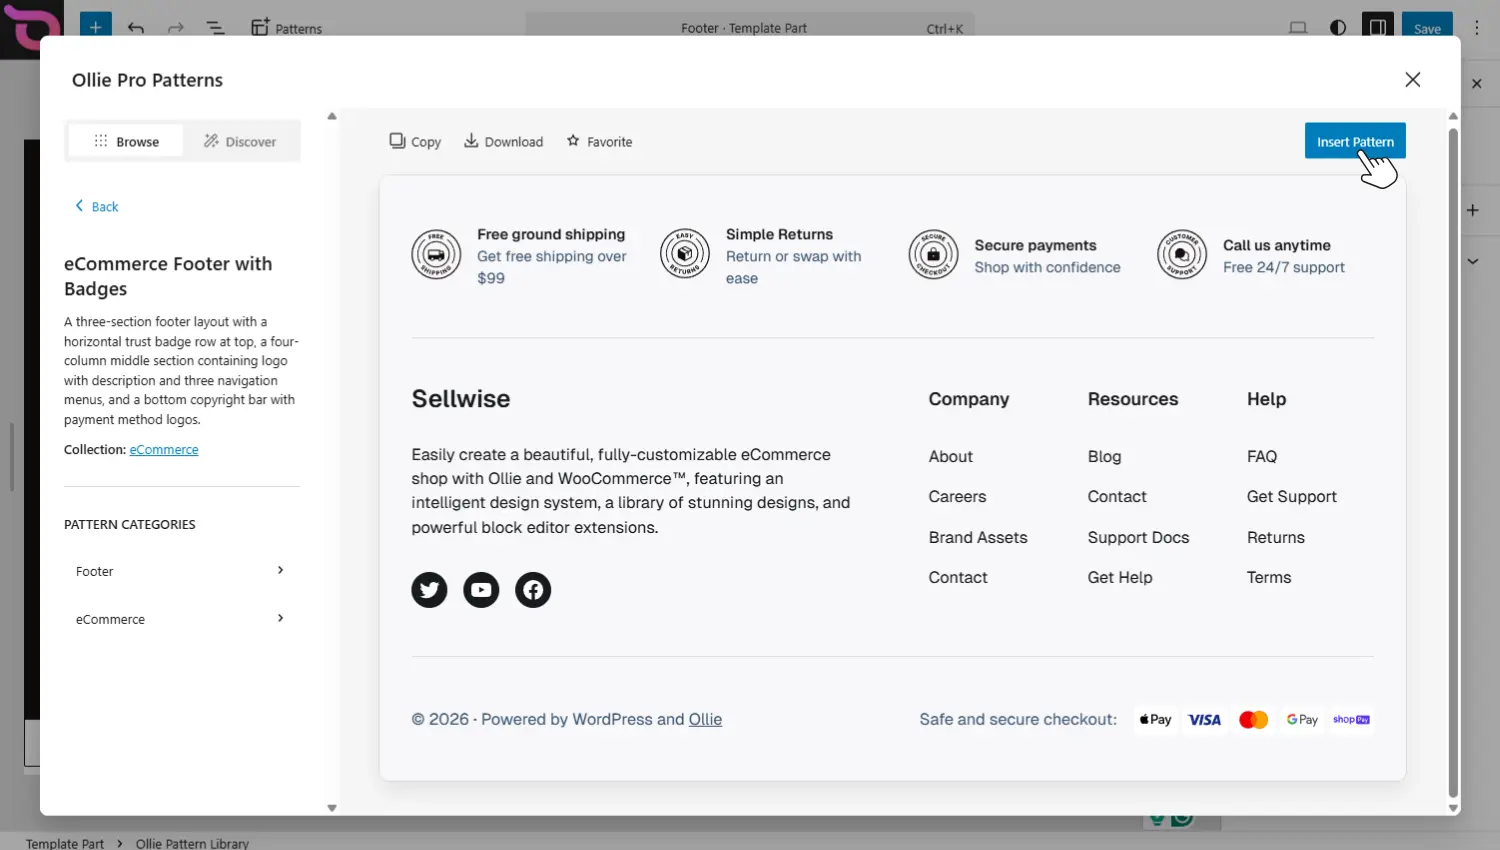
The footer pattern you pick will include some elements. For example, social icons, the footer credit, resources, products, company details, etc. Here’s where you decide what you’ll remove, keep, or customize.
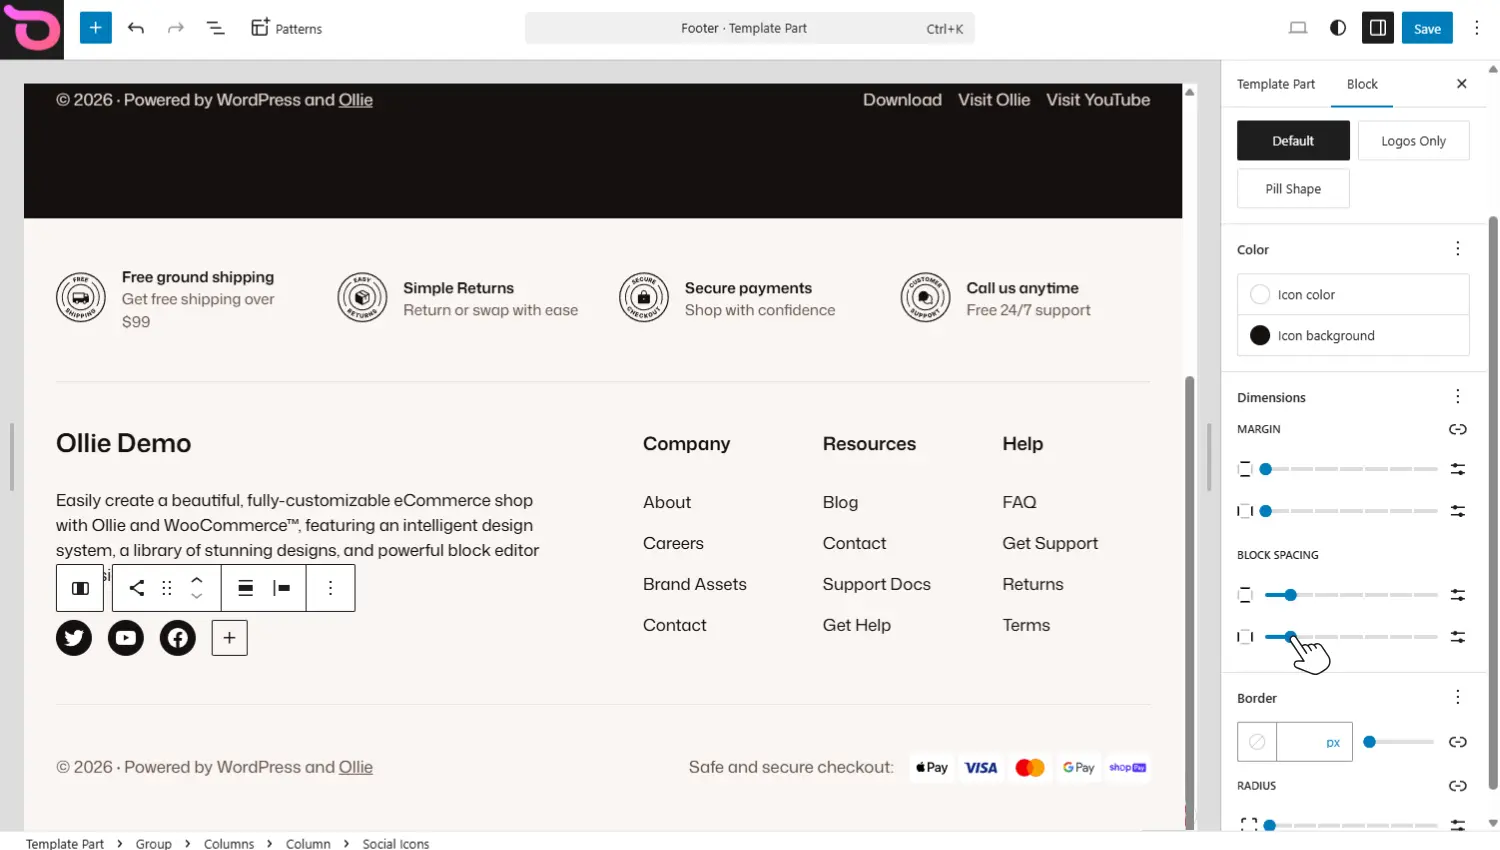
Step 5: Customize footer styles
Next, you’ll customize the footer’s appearance. Like any other part of your website, the styles available to you depend on the block or element you’re editing. You can change the styles of the parent block and the child blocks within it individually.
Let’s look at an example:
- Click on the block you want to edit.
- Once you select it, you’ll see quick styling controls appear above the block. Here, you can choose how to align or justify items.
- You’ll also see a set of controls in the right-hand sidebar that you can use to customize the contents of the block.

- For the social icon logos, you can choose to:
- Change their shape.
- Show logos only.
- Change margins, padding, and block spacing.
- Edit any other setting available to similar elements in the block editor.
Essentially, you edit the footer in the same way you do for any other area of your site.
Step 6: Save changes
After finishing all styling and layout changes, click on the blue Save button on the top right. This automatically updates the footer across every page on the site, since it is a shared template part.
Start customizing your WordPress footer with Ollie
Although editing the WordPress footer can confuse many users, it is much easier than you think with the right setup. The right setup is to use a block theme, as it lets you edit your footer visually in the WordPress Site Editor.
The WordPress block theme Ollie, together with the Ollie Pro plugin, gives you a simple way to edit your site’s footer. You get well-designed, pre-made template patterns which you can easily customize in the Site Editor. This theme is WordPress block-native, so you’ll be able to use every customization option available in the block editor (blocks, typography, sizing controls, etc.), plus more.
Get Ollie today and start customizing your WordPress footer the easy way.