

Learning how to use AI in WordPress became a lot more interesting with WordPress 7.0. If you’ve updated and gone looking for new AI features, you’ve probably found that WordPress looks much the same as before. There’s no chatbot, or ‘generate content’ button, and no AI settings anywhere.
WordPress took a different approach. It shipped the connection layer that lets you use your preferred AI provider (Anthropic, OpenAI, or Google), and left the specific features for plugins and themes to build.
So let’s talk about what all that means. In this guide, we’ll walk you through the two methods for connecting AI to your site (AI connectors and MCP), how Ollie AI uses each, and where AI website builders fit in.
TL;DR: How to use AI in WordPress
There are two approaches to using AI in WordPress: AI connectors and MCP.
- AI connectors let you connect your preferred AI provider (Anthropic, OpenAI, or Google) and use it inside the Site Editor. Ollie AI uses connectors to power its text generation features.
- MCP (Model Context Protocol) lets you connect an AI agent like Claude Desktop or Cursor to your site, so you can build and manage WordPress from the agent’s interface. Ollie AI has its own MCP that teaches your agent how to work with Ollie’s design system.
How to use AI in WordPress: 2 methods
AI connectors and MCP work differently and solve different problems. Connectors keep you inside WordPress, with AI helping you as you write and edit. MCP flips the setup around, letting you work with your AI agent as the interface and manage WordPress from there. The rest of this guide covers each method in detail, starting with AI connectors.
Method 1: AI connectors
What are WordPress AI connectors?
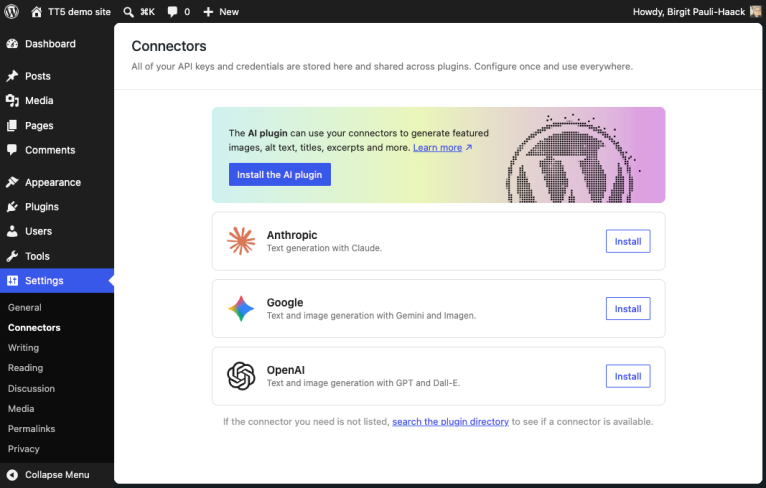
AI connectors are a native WordPress feature that link your site to an external AI provider.
You can currently connect to:
- Anthropic (Claude).
- OpenAI (ChatGPT).
- Google Gemini.
Once connected, compatible plugins and themes can use that provider to power AI features inside the Site Editor.
How connectors work
Let’s say Google Gemini is your AI provider of choice, and you’ve installed an SEO plugin with some AI features. If you prompt the AI to write a meta description in the Site Editor, WordPress doesn’t generate this on its own.
Instead, it sends your request to Gemini through an API (the AI Client API). Gemini processes this request and returns the AI-generated meta description to WordPress.
In short, you connect to your AI provider once on the Connectors screen, and that connection is available site-wide. Any plugin or theme built to use the AI Client API can tap into the AI provider you’ve connected to.
WordPress provides the infrastructure for the connection. The AI platform does the actual work.
What can you do with connectors?
Once you’ve connected WordPress to an AI provider, you can start using AI features built into compatible themes and plugins.
Connecting to an AI provider does nothing visible on its own, and no new features appear on your site. The features come from what’s built on top of that connection, which are themes or plugins that can call the AI Client API.
The AI-powered features you can use depend on the plugin or theme you’re using, provided it’s built to use the AI Client. If it’s an SEO plugin, you’ll be able to use your preferred AI provider to perform SEO tasks within WordPress.
Ollie AI uses WordPress’s connectors in the same way.
How Ollie uses AI connectors
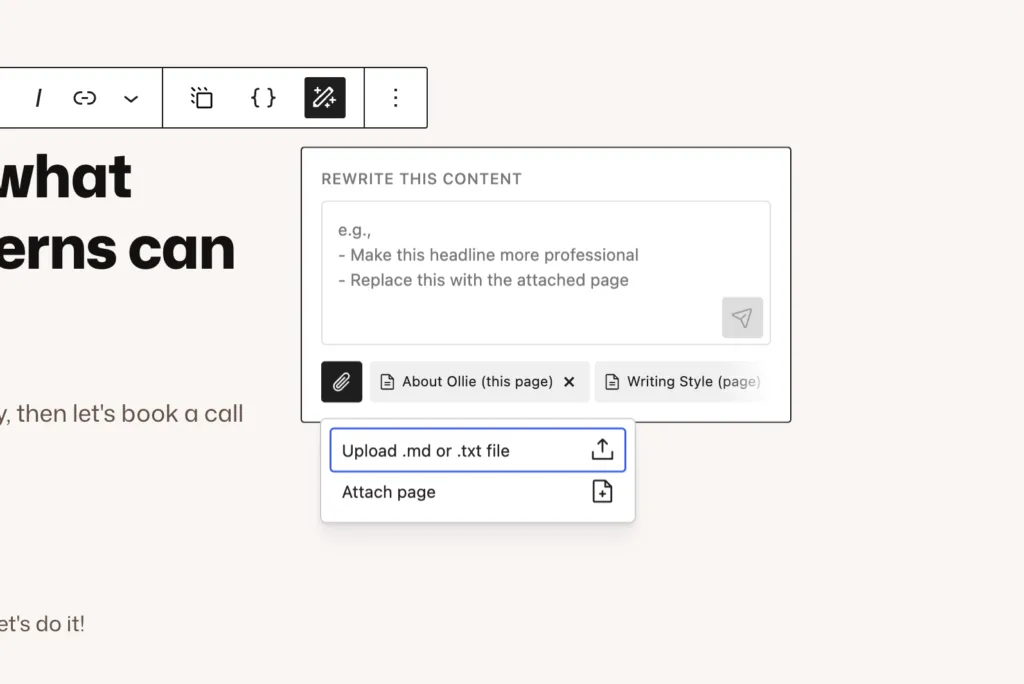
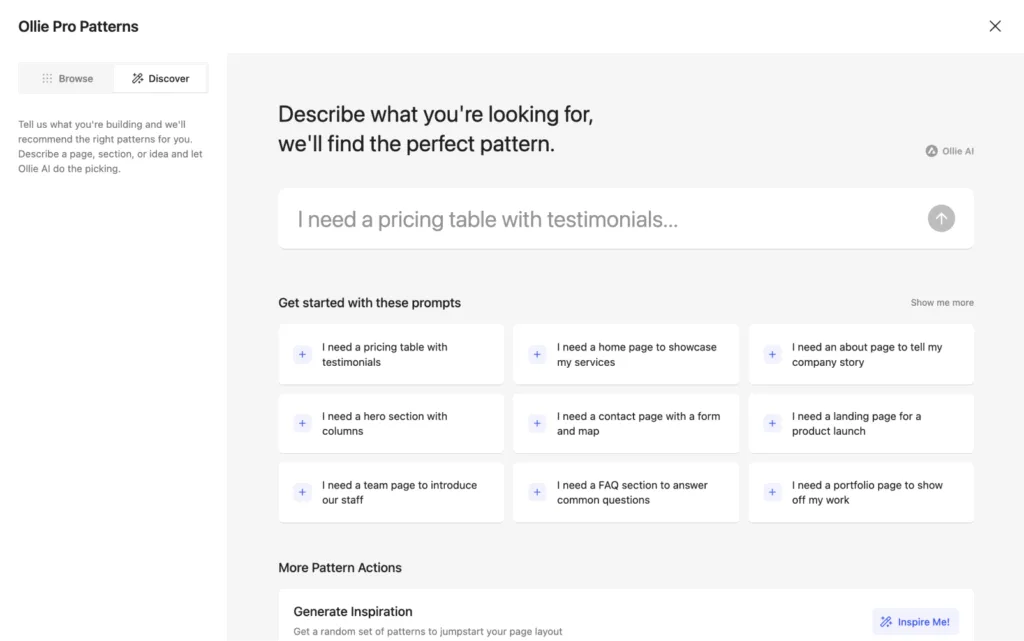
Ollie has built its AI-powered text-based content generation features on top of the WordPress connectors infrastructure. Once you connect your AI provider, you’ll be able to use the following features right from the Site Editor:
The Writing Prompt block
This is a new block added by Ollie AI, which you can use anywhere on your site. The Writing Prompt block opens an in-editor AI prompt box where you can describe what you want the AI to write on the page. Then the AI writes it for you from scratch.
For example, if you have a WooCommerce store, you can use this to help you write product descriptions, landing page copy, and product titles. In this prompt box, you’ll be able to attach web pages or upload files that give the AI additional context on how to write what you want.
This could be a style guide or a product sheet. The additional context file (or web page) provides the AI with more instructions to work with, leading to more accurate responses.
AI Rewrite
While the Writing Prompt block generates content from scratch, Ollie’s AI Rewrite feature lets you improve existing content. This includes titles, headlines, paragraphs, and any other text content on your site.
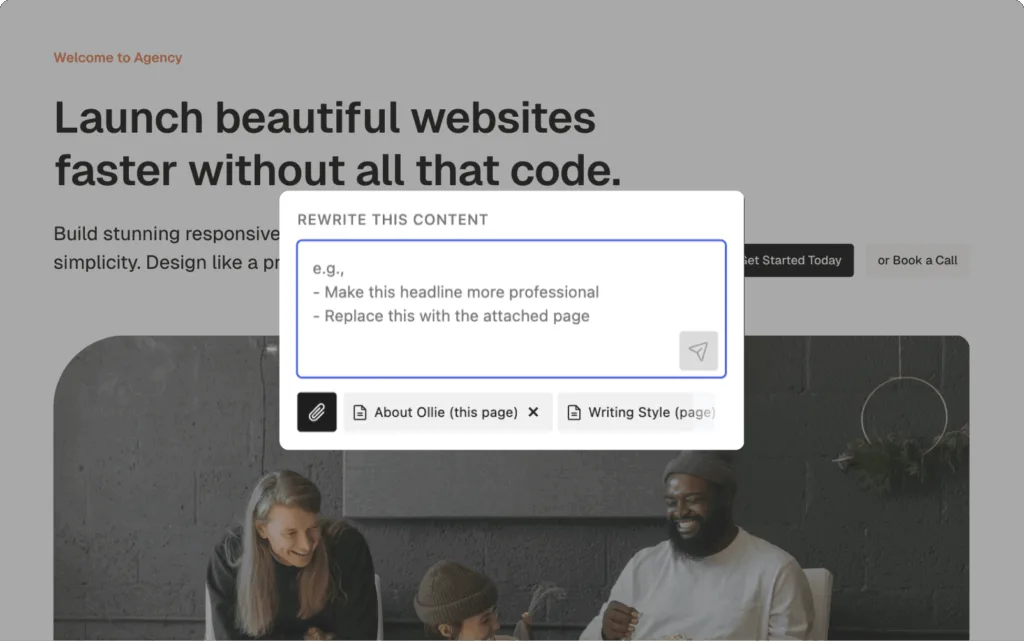
The AI Rewrite feature is in the Site Editor’s toolbar, next to other text-editing controls like change heading tag and align text.
Once you access the prompt box, you tell the AI how you want to improve the selected text. Something like ‘Make this heading shorter and punchier’. You can add files to give more context, just like in the Writing Prompt block. Then the AI will respond with several variations for you to choose from.
How to use connectors in Ollie
With WordPress 7.0 installed, you can connect to an AI provider and start using Ollie AI features by following these steps:
- Go to Connectors. You’ll find Connectors under Settings on your WordPress dashboard. Here, you’ll see three default providers listed: OpenAI, Anthropic, and Google. Clicking on one will prompt you to add an API key.
- Add your AI provider’s API key. You’ll need to generate an API key from your provider’s platform. You don’t need all three – generate a key for your preferred provider.
- Paste the API key and save. Enter the key in the provider’s field and save.
- Test Ollie’s AI features. After connecting to your provider, you can use Ollie AI’s text-generation features. You only need to open the Site Editor and start writing new content and improving existing content using AI.
So that’s what connectors are and how Ollie AI builds on top of them. Let’s move on to the other way of using AI in WordPress.
Method 2: MCP (Model Context Protocol)
What is MCP?
MCP (short for Model Context Protocol) is an open standard that enables AI applications to access external systems and perform actions in them.
You can use MCP to connect an AI agent (for example, Claude Code or Cursor) to your WordPress site and interact with it directly. While Connectors let AI generate content inside WordPress, MCP lets an AI agent act on WordPress from the outside.
How do MCPs work in WordPress?
Connecting an AI agent to WordPress through MCP relies on two pieces of the AI infrastructure working together.
These are:
- The Abilities API. This is a registry where every part of your website, whether it’s a blog post setting, page builder, or SEO plugin, registers what it does. Using this API, your site can create a simple list of actions it can perform.
- The MCP Adapter. This translates the list of actions into a language the AI tool can understand. From this, the AI agent will understand how to perform specific actions in WordPress (for example, creating a page), plus what it’s allowed to do.
After establishing this connection, you can interact with your WordPress site remotely from your AI agent’s interface. You don’t need to log in to WordPress.
What can you do with WordPress MCP?
Now that the AI agent knows what it can do and how to do it, you can ask it to do the following:
- Create or update a post.
- Edit existing content, for instance, updating articles, rewriting sections, or refreshing outdated information.
- Manage your site’s content by updating metadata or organizing pages.
- Automating repetitive workflows, such as updating all internal links when a page’s URL changes.
You’ll do this from the agent’s interface and using natural language.
How to use Ollie MCP
Ollie AI has an MCP server you can use to connect your preferred AI agent to your WordPress website, speeding up website creation and editing.
The WordPress MCP understands WordPress. This makes it ideal for performing standard WordPress tasks, such as editing a page or creating a post. But it doesn’t know anything about Ollie’s design philosophy.
The Ollie MCP understands Ollie’s design system, and it teaches the AI agent how to work with Ollie.
It ensures the AI agent understands Ollie’s:
- Pattern collections.
- Design variations.
- Extensions (Grid controls, animation designer, responsive controls, etc).
- WooCommerce features.
- Spacing rules and typography scales.
As a result, the AI agent will generate designs using Ollie’s professionally designed assets and following its design rules, rather than randomly putting blocks together.
How does this work, and what can you do with it?
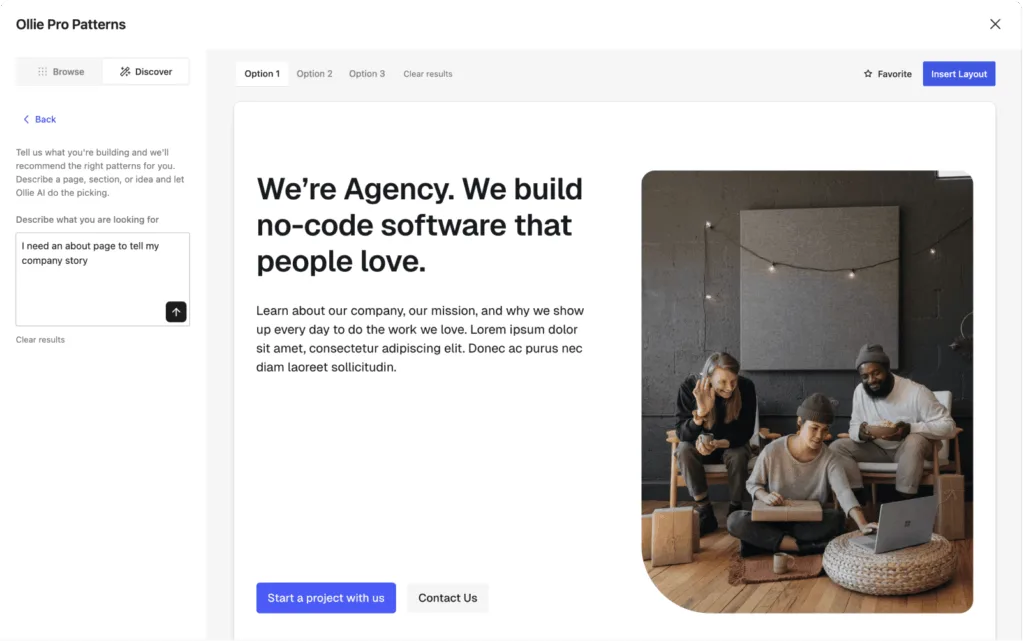
Let’s say you’ve connected to Claude Desktop, and you ask the agent to create a landing page for your photography business. Instead of creating a generic photography business landing page, your agent will first look for specific design patterns in Ollie’s pattern library.
Then it will assemble these patterns into a landing page while following Ollie’s design philosophy. The result will be a landing page that matches Ollie’s design system and general aesthetic.
After generating the design, you’ll get a link to edit the page using the Site Editor and Ollie.
How to get started with Ollie MCP
To get started, you’ll need an AI agent that supports MCP, for example, Claude Desktop. Connecting an AI agent to your WordPress site via the Ollie MCP is somewhat manual. This isn’t a WordPress or Ollie thing; it’s just how MCP works right now.
Here are the general steps you’ll follow to connect your AI agent via the Ollie MCP:
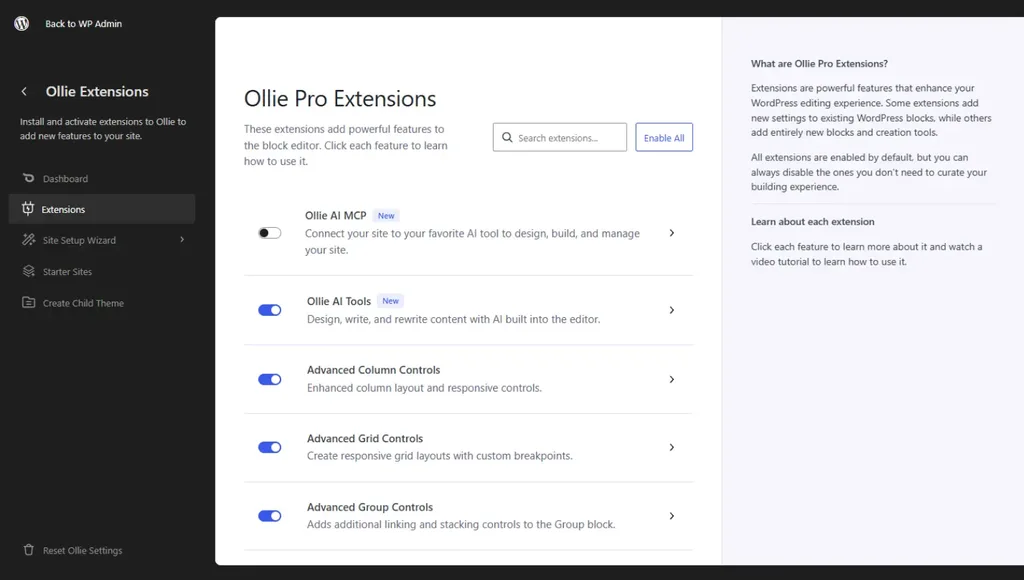
- Enable Ollie AI. Ollie AI is available as an Ollie Pro extension. You’ll need to first enable it, then set up the Ollie MCP.
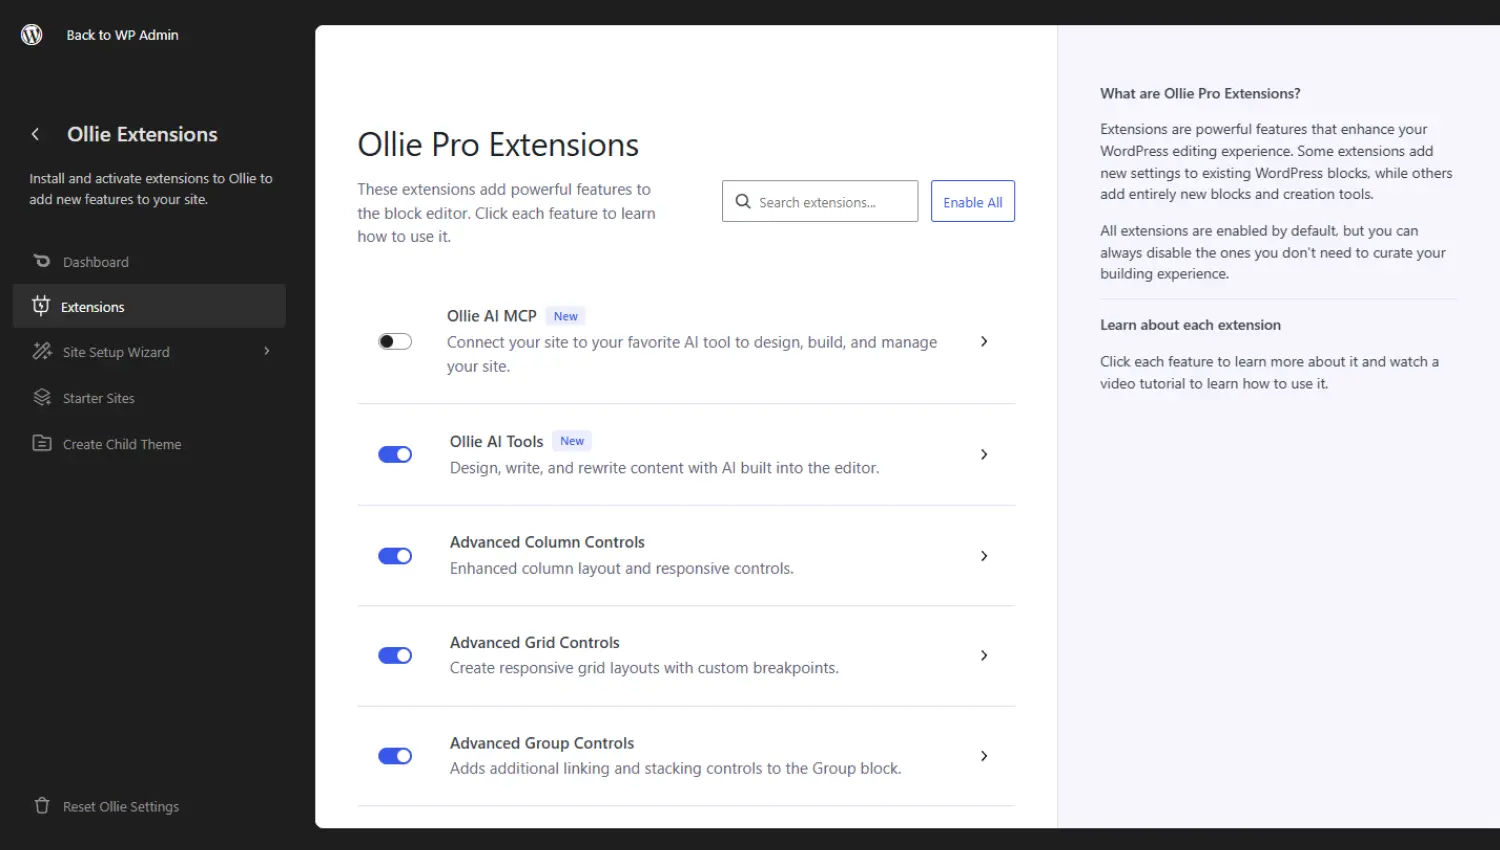
- Set up MCP. To set up MCP, you’ll need to do two things:
- Install the MCP Adapter plugin that comes from WordPress. This plugin helps to set up the MCP connection.
- Set up an application password. This allows your agent to do things on your site on your behalf.
- Connect your AI tool. This is a manual process that involves adding a code snippet and customizing it. We’ve included detailed steps on how to do it in the Ollie AI extension page.
- Install Ollie Skill. This refers to additional instructions to your AI agent on how to work with Ollie. You download the Ollie Skill, then upload it to your AI agent.
We’ve summarized the steps you’ll need to follow to connect your AI agent via the Ollie MCP here. This detailed Ollie MCP video walkthrough takes you through this in detail.
Connectors vs MCP: which should you use?
AI connectors and MCP solve different problems. AI connectors are designed to assist you while you’re working inside the WordPress Gutenberg Editor. MCP lets you manage your site through an external AI agent.
What you choose depends on where you want to work and what you want AI to do. Here’s a quick guide to help you decide which approach is right for you.
Choose AI connectors if:
- You want to use AI to help write or improve content while working inside the WordPress editor.
- You’re comfortable working in the WordPress dashboard, and you want AI to assist with content creation.
MCP is a better option if:
- You want to manage, build, or update your WordPress site through an AI chat interface without logging in.
- You already use AI agents for coding, writing, or productivity, and you want to manage your website through the same setup.
Keep in mind that you don’t have to choose one or the other. You can use them together. You could use AI connectors to generate and refine content within WordPress and the MCP when you want to work with your Agent.
If you’ve been looking at how to use AI in WordPress, you’ve probably come across AI site builders as another option.
What about AI website builders for WordPress?
AI website builders are a separate category that’s worth understanding before you commit to connectors or MCP. Instead of adding AI to your existing site, they generate a full site (or landing page) from a prompt as a starting point. You then edit the result in a drag-and-drop builder.
The main options include ZipWP (from the Astra team), Elementor AI, Brizy AI, and the built-in AI builders offered by hosts like Hostinger and Bluehost.
One thing to check before committing to an AI builder: the site it generates often depends on that builder’s page templates, page builder, or design system. If you switch providers later, you may have to rebuild sections of your site rather than just swap the AI connection. Connectors and MCP don’t have this constraint because your site stays a standard WordPress site regardless of which AI provider you connect.
Get to grips with how to use AI in WordPress
Instead of adding specific AI features to the platform, WordPress has built the infrastructure for you to connect to AI and start using it on your website.
This infrastructure provides two practical ways to bring AI into WordPress:
- AI connectors for in-editor content assistance.
- MCP for building and managing your site through an external AI agent.
Ollie AI supports both features and even goes further with its own MCP. This MCP teaches your AI agent about Ollie’s design system and how to work with it. This way, designs generated by the agent will use Ollie’s assets and follow its design rules, rather than being generic.
Get Ollie Pro and start using Ollie AI to easily build and manage your website.
